The aim of this long article is to give you the instructions and tools to migrate your production database, from your current environment to a solution based on Percona Everest (MySQL).
Nice, you decided to test Percona Everest, and you found that it is the tool you were looking for to manage your private DBaaS. For sure the easiest part will be to run new environments to get better understanding and experience on how the solution works. However, the day when you will look to migrate your existing environments will come. What should you do?
Prepare a plan! In which the first step is to understand your current environment.
When I say understand the current environment, I mean that you need to have a clear understanding of:
- the current dimensions (CPU/Memory/Disk utilization)
- the way it is accessed by the application, what kind of query you have, is Read or Write intensive, do you have pure OLTP or also some analytic, any ELT processing
- the way it is used, constant load or by time of the day or by day of the year? Do you have any peak ie: Black Friday
- what is the RPO/RTO, do you need a Disaster Recovery site?
- Who is accessing your database, and why.
- What MySQL version are you using, is it compatible with Percona Everest MySQL versions?
Once you have all the information, it is time to perform a quick review if the solution could fit or not, for this step, given its complexity, I suggest you contact Percona and get help from our experts to take the right decision.
From the above process you should come with few clear indications such as:
- Needed resources
- It is more read, write or 50/50
- The level of recovery I need
The first thing to do is to calculate the optimal configuration. For this you can help yourself with the mysqloperatorcalculator. The tool will give you the most relevant variables to set for MySQL, configuration that you will be able to pass to Percona Everest while creating the new cluster.
To install Percona Everest see here
Create the new cluster
It is now time to open our Percona Everest console and start the adventure.

In the basic information step, look at the supported versions for Database Server

This version and the source version must match to safely use the CLONE plugin. Note that you cannot clone between MySQL 8.0 and MySQL 8.4 but can clone within a series such as MySQL 8.0.37 and MySQL 8.0.42. Before 8.0.37, the point release number also had to match, so cloning the likes of 8.0.36 to 8.0.42 or vice-versa is not permitted
It is now time to set the resources, the value of them should come from the analysis previously performed.

Given that choose 1 (one) node, then Custom and feel the fields as appropriate.

In advance configuration add the IP(s) you want to allow to access the cluster. You must add the IP of the source, IE 18.23.4.12/32.
In the set database engine parameters add the values (for MySQL only) that the mysqloperatorcalculator is giving you. Do not forget to have the mysqld section declaration.
For example, in our case I need to calculate the needed values for a MySQL server with 4 CPU 8GB ram serving OLTP load, once you have the mysqloperatorcalculator tool running:
$ curl -i -X GET -H "Content-Type: application/json" -d '{"output":"human","dbtype":"pxc", "dimension": {"id": 999, "cpu":4000,"memory":"8G"}, "loadtype": {"id": 3}, "connections": 300,"mysqlversion":{"major":8,"minor":0,"patch":36}}' http://127.0.0.1:8080/calculator
You will get a set of values that after cleanup looks like:
[mysqld]
    binlog_cache_size = 262144
    binlog_expire_logs_seconds = 604800
    binlog_format = ROW
… snip …
    loose_wsrep_sync_wait = 3
    loose_wsrep_trx_fragment_size = 1048576
    loose_wsrep_trx_fragment_unit = bytes
Add the text in the TEXTAREA for the database parameters.

Enable monitoring if you like then click on Create database.
Once ready you will have something like this:

Or from shell
$ kubectl get pxc
NAME         ENDPOINT   STATUS   PXC   PROXYSQL   HAPROXY   AGE
test-prod1   xxx        ready    1                1         2m49s

$ kubectl get pods
NAME                                              READY   STATUS    RESTARTS   AGE
percona-xtradb-cluster-operator-fb4cf7f9d-97rfs   1/1     Running   0          13d
test-prod1-haproxy-0                              3/3     Running   0          106s
test-prod1-pxc-0                                  2/2     Running   0          69s
We are now ready to continue our journey.
Align the system users
This is a very important step. Percona Everest use the Percona Operator who will create a set of system users in the database, and these users must be present also in the source with the same level of GRANTS, otherwise after the clone phase is terminated, the system will not work correctly.
Keep in mind Percona Everest will create the users with some generated password, these passwords may or may not fit your company rules or be simply too crazy. Do not worry you will be able to change them. For now, let's see what the system has generated.

To see how to access the cluster click on the “^” top right, it will expand the section. User is “root” now unhide the password… Ok I don’t know you, but I do not like it at all. Let me change to the password I have already defined for root in the source.
Percona Everest is not (yet) allowing you to modify the system users’ passwords from the GUI, but you can do it from command line:
DB_NAMESPACE=namespace';
DB_NAME='cluster-name';
USER='user';
PASSWORD='new-password';
kubectl patch secret everest-secrets-"$DB_NAME" -p="{"stringData":{"$USER": "$PASSWORD"}}" -n "$DB_NAMESPACE"
Before changing let us check what password we have also for the other system users.
About system users in Operator for MySQL (PXC based) we have the following:
- root
- operator
- xtrabackup
- monitor
- replication
To get all of them use command line:
DB_NAMESPACE='namespace'; DB_NAME='cluster-name'; kubectl get secret everest-secrets-"$DB_NAME" -n "$DB_NAMESPACE" -o go-template='{{range $k,$v := .data}}{{"### "}}{{$k}}{{"| pw: "}}{{$v|base64decode}}{{"nn"}}{{end}}'|grep -E 'operator|replication|monitor|root||xtrabackup'
### monitor| pw: $&4fwdoYroBxFo#kQi
### operator| pw: NNfIUv+iL+J!,.Aqy94
### replication| pw: Rj89Ks)IVNQJH}Rd
### root| pw: f~A)Nws8wD<~%.j[
### xtrabackup| pw: h)Tb@ij*0=(?,?30
Now let me change my root user password:
$ DB_NAMESPACE='namespace'; DB_NAME='cluster-name'; USER='root'; PASSWORD='root_password'; kubectl patch secret everest-secrets-"$DB_NAME" -p="{"stringData":{"$USER": "$PASSWORD"}}" -n "$DB_NAMESPACE"
Now if I collapse and expand again (forcing a reload of the section):

My root user password is aligned with the one I pushed.
As we have seen we have to decide what to do, so first thing is to check if our SOURCE has or not the users defined. If not, then it is easy we will just grab the users from the newly generated cluster and recreate them in the SOURCE.
To do so we will query the source database:
(root@localhost) [(none)]>select user,host,plugin from mysql.user order by 1,2;
+----------------------------+---------------+-----------------------+
| user                       | host          | plugin                |
+----------------------------+---------------+-----------------------+
| app_test                   | %             | mysql_native_password |
| dba                        | %             | mysql_native_password |
| dba                        | 127.0.0.1     | mysql_native_password |
| mysql.infoschema           | localhost     | caching_sha2_password |
| mysql.pxc.internal.session | localhost     | caching_sha2_password |
| mysql.pxc.sst.role         | localhost     | caching_sha2_password |
| mysql.session              | localhost     | caching_sha2_password |
| mysql.sys                  | localhost     | caching_sha2_password |
| operator                   | %             | caching_sha2_password |
| pmm                        | 127.0.0.1     | caching_sha2_password |
| pmm                        | localhost     | caching_sha2_password |
| replica                    | 3.120.188.222 | caching_sha2_password |
| root                       | localhost     | caching_sha2_password |
+----------------------------+---------------+-----------------------+
We are lucky and there is nothing really conflicting, so we can export and create the users inside the SOURCE. To do so you can use pt-show-grants:
pt-show-grants --host cluster-end-point --port 3306 --user dba --password dba --only 'monitor'@'%','xtrabackup'@'%',operator@'%',replication@'%',root@'%
This will generate an SQL output that you can run on the source. Please review it before running to be sure it will be safe for you to run it.
Once applied to source we will have:
+----------------------------+---------------+-----------------------+
| user                       | host          | plugin                |
+----------------------------+---------------+-----------------------+
| app_test                   | %             | mysql_native_password |
| dba                        | %             | mysql_native_password |
| dba                        | 127.0.0.1     | mysql_native_password |
| monitor                    | %             | caching_sha2_password |
| mysql.infoschema           | localhost     | caching_sha2_password |
| mysql.pxc.internal.session | localhost     | caching_sha2_password |
| mysql.pxc.sst.role         | localhost     | caching_sha2_password |
| mysql.session              | localhost     | caching_sha2_password |
| mysql.sys                  | localhost     | caching_sha2_password |
| operator                   | %             | caching_sha2_password |
| pmm                        | 127.0.0.1     | caching_sha2_password |
| pmm                        | localhost     | caching_sha2_password |
| replica                    | 3.120.188.222 | caching_sha2_password |
| replication                | %             | caching_sha2_password |
| root                       | %             | caching_sha2_password |
| root                       | localhost     | caching_sha2_password |
| xtrabackup                 | %             | caching_sha2_password |
+----------------------------+---------------+-----------------------+
The last step to do about the users, is to create a specific user to use for the migration. We will use it to perform the clone and after that we will remove it.
On SOURCE:
create user migration@'%' identified by 'migration_password';
     grant backup_admin on *.* to migration@'%'
On RECEIVER (new cluster):
  create user migration@'%' identified by 'migration_password';
     GRANT SYSTEM_USER, REPLICATION SLAVE, CONNECTION_ADMIN, BACKUP_ADMIN, GROUP_REPLICATION_STREAM, CLONE_ADMIN,SHUTDOWN ON *.* to migration@'%';
Let us go CLONING
First, is the CLONE plugin already there?
Discover this querying the two systems:
SELECT PLUGIN_NAME, PLUGIN_STATUS FROM INFORMATION_SCHEMA.PLUGINS  WHERE PLUGIN_NAME = 'clone';
SOURCE:
+-------------+---------------+
| PLUGIN_NAME | PLUGIN_STATUS |
+-------------+---------------+
| clone       | ACTIVE        |
+-------------+---------------+
RECEIVER:
mysql> SELECT PLUGIN_NAME, PLUGIN_STATUS FROM INFORMATION_SCHEMA.PLUGINS  WHERE PLUGIN_NAME = 'clone';
Empty set (0.42 sec)
RECEIVER doesn’t have the plugin active. Let us activate it:
INSTALL PLUGIN clone SONAME 'mysql_clone.so';
Warning!
If your source is behind a firewall, you need to allow the RECEIVER to connect, to get the IP of the RECEIVER just do:
kubectl -n namespace exec mysqlpodname -c pxc -- curl -4s ifconfig.me
This will return an IP, you need to add that IP to the firewall and allow the access. Keep this value aside, you will also need later to setup the asynchronous replication.
Are we ready? Not really, there is a caveat here. If we clone with the Galera library active, the cloning will fail.
To have it working we must:
- disable the wsrep provider
- stop operator probes to monitor the pod
- connect directly to the pod to run the operation and to monitor it.
To do the above, on the receiver, we can:
- add wsrep_provider=none to the configuration
- as soon as the pod is up (monitor the log) issue from command line the command:
kubectl -n namespace exec pod-name -c pxc -- touch /var/lib/mysql/sleep-forever
- Connect to the pod using:
kubectl exec --stdin --tty <pod name> -n <namespace> -c pxc -- /bin/bash
During the time of the operations, the cluster will not be accessible from its end point and HAProxy pod will result down as well, all this is OK, don’t worry.
Let us go…
While monitoring the log and pod:
kubectl logs pod-name --follow -c pxc
kubectl get pods

Once you click continue and then edit database, the pod will be restarted.
Wait for the message in the log:
[MY-010931] [Server] /usr/sbin/mysqld: ready for connections. Version: '8.0.36-28.1'  socket: '/tmp/mysql.sock'  port: 3306  Percona XtraDB Cluster (GPL), Release rel28, Revision bfb687f, WSREP version 26.1.4.3.
2024-07-29T17:22:11.933714Z 0 [System] [MY-013292] [Server] Admin interface ready for connections, address: '10.1.68.172'  port: 33062
As soon as you see it, run the command to prevent Operator to restart the pod:
kubectl -n namespace exec pod-name -c pxc -- touch /var/lib/mysql/sleep-forever
Confirm file is there:
kubectl -n namespace exec pod-name -c pxc -- ls -l /var/lib/mysql|grep sleep
Checking the status you will have:
NAME                                              READY   STATUS    RESTARTS   AGE
percona-xtradb-cluster-operator-fb4cf7f9d-97rfs   1/1     Running   0          13d
test-prod1-haproxy-0                              2/3     Running   0          21h
test-prod1-pxc-0                                  1/2     Running   0          46s
Now you can connect to your pod only locally:
kubectl exec --stdin --tty <pod name> -n <namespace> -c pxc -- /bin/bash
Once there:
mysql -uroot -p<root_password>
And you are in.
I suggest you to open two different bash terminals and in one run the monitor query:
while [ 1 == 1 ]; do mysql -uroot -p<root_password> -e "select id,stage,state,BEGIN_TIME,END_TIME,THREADS,((ESTIMATE/1024)/1024) ESTIMATE_MB,format(((data/estimate)*100),2) 'completed%', ((DATA/1024)/1024) DATA_MB,NETWORK,DATA_SPEED,NETWORK_SPEED from performance_schema.clone_progress;";sleep 1;done;
This command will give you a clear idea of the status of the cloning process.
To clone from a SOURCE you need to tell the RECEIVER which source to trust.
On the other bash, inside the mysql client:
SET GLOBAL clone_valid_donor_list = 'source_public_ip:port';
CLONE INSTANCE FROM 'migration'@'ip':port IDENTIFIED BY 'XXX';
While cloning your monitor query will give you the status of the operation:
+------+-----------+-------------+----------------------------+----------------------------+---------+-----------------+------------+---------------+------------+------------+---------------+
| id   | stage     | state       | BEGIN_TIME                 | END_TIME                   | THREADS | ESTIMATE_MB     | completed% | DATA_MB       | NETWORK    | DATA_SPEED | NETWORK_SPEED |
+------+-----------+-------------+----------------------------+----------------------------+---------+-----------------+------------+---------------+------------+------------+---------------+
|    1 | DROP DATA | Completed   | 2024-07-30 15:07:17.690966 | 2024-07-30 15:07:17.806309 |       1 |      0.00000000 | NULL       |    0.00000000 |          0 |          0 |             0 |
|    1 | FILE COPY | In Progress | 2024-07-30 15:07:17.806384 | NULL                       |       4 | 130692.40951157 | 3.55       | 4642.11263657 | 4867879397 |  491961485 |     491987808 |
|    1 | PAGE COPY | Not Started | NULL                       | NULL                       |       0 |      0.00000000 | NULL       |    0.00000000 |          0 |          0 |             0 |
|    1 | REDO COPY | Not Started | NULL                       | NULL                       |       0 |      0.00000000 | NULL       |    0.00000000 |          0 |          0 |             0 |
|    1 | FILE SYNC | Not Started | NULL                       | NULL                       |       0 |      0.00000000 | NULL       |    0.00000000 |          0 |          0 |             0 |
|    1 | RESTART   | Not Started | NULL                       | NULL                       |       0 |      0.00000000 | NULL       |    0.00000000 |          0 |          0 |             0 |
|    1 | RECOVERY  | Not Started | NULL                       | NULL                       |       0 |      0.00000000 | NULL       |    0.00000000 |          0 |          0 |             0 |
+------+-----------+-------------+----------------------------+----------------------------+---------+-----------------+------------+---------------+------------+------------+---------------+
When the process is completed, the mysqld will shut down.
Checking in the log you will see something like this:
The /var/lib/mysql/sleep-forever file is detected, node is going to infinity loop
If you want to exit from infinity loop you need to remove /var/lib/mysql/sleep-forever file
Do not worry all is good!
At this point we want to have MySQL start again and validate the current files:
kubectl -n namespace exec podname -c pxc – mysqld &
Check the log and if all is ok, connect to mysql using local client:
kubectl exec --stdin --tty <pod name> -n <namespace> -c pxc -- /bin/bash
mysql -uroot -p<password>
Issue shutdown command from inside.
It is time to remove the wsrep_provider=none and after the sleep-forever file.
Go to the Percona Everest GUI and remove from the Database Parameters wsrep_provider=none click continue and then edit database.
Final step, remove the file:
kubectl -n namespace exec podname -c pxc -- rm -f /var/lib/mysql/sleep-forever
Cluster will come back (after few restarts) with the new dataset and pointed to the SOURCE GTID:
mysql> select @@gtid_executed;
+-----------------------------------------------+
| @@gtid_executed                               |
+-----------------------------------------------+
| aeb22c03-7f13-11ee-9ff6-0224c88bdc4c:1-698687 |
+-----------------------------------------------+
Enable Replication
Now if you are used to Percona Operator for MySQL (PXC based) you probably know that it does support remote asynchronous replication. This feature is available in the operator used by Everest but it is not exposed yet.
The benefit of using the “native” replication is that the replication will be managed by the operator in case of pod crash. This will allow the cluster to continue to replicate cross pods.
On the other hand, the method described below, which for the moment (Percona Everest v1.0.1) is the only applicable, require manual intervention to start the replication in case of pod failure.
Clarified that, here are the steps you need to follow to enable replication between the new environment and your current production.
On source:
CREATE USER <replicauser>@'3.120.188.222' IDENTIFIED BY '<replicapw>';
GRANT REPLICATION SLAVE ON *.* TO replica@'<replica_external_ip>';
The IP of replica_external_ip is the one I told you to keep aside, for convenience here the command to get it again:
kubectl -n namespace exec podname -c pxc -- curl -4s ifconfig.me
On Receiver, connect to the pod using mysql client and type:
CHANGE REPLICATION SOURCE TO SOURCE_HOST='<source>', SOURCE_USER=<replicauser>, SOURCE_PORT=3306, SOURCE_PASSWORD='<replicapw>', SOURCE_AUTO_POSITION = 1
Then start replication as usual.
If all was done right, you will have the Replication working and your new database is replicating from current production, keeping the two in sync.
mysql> show replica statusG
*************************** 1. row ***************************
             Replica_IO_State: Waiting for source to send event
                  Source_Host: 18.198.187.64
                  Source_User: replica
                  Source_Port: 3307
                Connect_Retry: 60
              Source_Log_File: binlog.000001
          Read_Source_Log_Pos: 337467656
               Relay_Log_File: test-prod1-pxc-0-relay-bin.000002
                Relay_Log_Pos: 411
        Relay_Source_Log_File: binlog.000001
           Replica_IO_Running: Yes
          Replica_SQL_Running: Yes
… snip …
            Executed_Gtid_Set: aeb22c03-7f13-11ee-9ff6-0224c88bdc4c:1-698687
                Auto_Position: 1
         Replicate_Rewrite_DB:
                 Channel_Name:
           Source_TLS_Version:
       Source_public_key_path:
        Get_Source_public_key: 0
            Network_Namespace:
Final touch
The final touch is to move the cluster from 1 node to 3 nodes.
$ kubectl get pods
NAME                                              READY   STATUS    RESTARTS      AGE
percona-xtradb-cluster-operator-fb4cf7f9d-97rfs   1/1     Running   0             14d
test-prod1-haproxy-0                              2/2     Running   6 (48m ago)   77m
test-prod1-pxc-0                                  1/1     Running   0             45m
To do so, open the Percona Everest GUI, edit your database and in the Resources tab, choose 3 nodes, then continue till the end and edit database.

At the end of the update process, you will have:
$ kubectl get pods
NAME                                              READY   STATUS    RESTARTS       AGE
percona-xtradb-cluster-operator-fb4cf7f9d-97rfs   1/1     Running   0              14d
test-prod1-haproxy-0                              2/2     Running   6 (151m ago)   3h1m
test-prod1-haproxy-1                              2/2     Running   0              103m
test-prod1-haproxy-2                              2/2     Running   0              102m
test-prod1-pxc-0                                  1/1     Running   0              149m
test-prod1-pxc-1                                  1/1     Running   0              103m
test-prod1-pxc-2                                  1/1     Running   0              93m
At this point you have your new environment ready to go.
Post migration actions
Remember that there are always many other things to do once you have migrated the data:
- Validate Data Integrity
- Consistency Check: Use tools like mysqlcheck or Percona’s pt-table-checksum to ensure data integrity and consistency between MySQL 8.0 and Percona Everest.
- Query Testing: Run critical queries and perform load testing to ensure that performance metrics are met and that queries execute correctly.
- Test and Optimize
- Benchmarking: Conduct performance benchmarking to compare MySQL 8.0 and Percona Everest. Use tools like sysbench or MySQL’s EXPLAIN statement to analyze query performance.
- Optimization: Tweak Percona Everest settings based on the benchmark results. Consider features like Percona’s Query Analytics and Performance Schema for deeper insights.
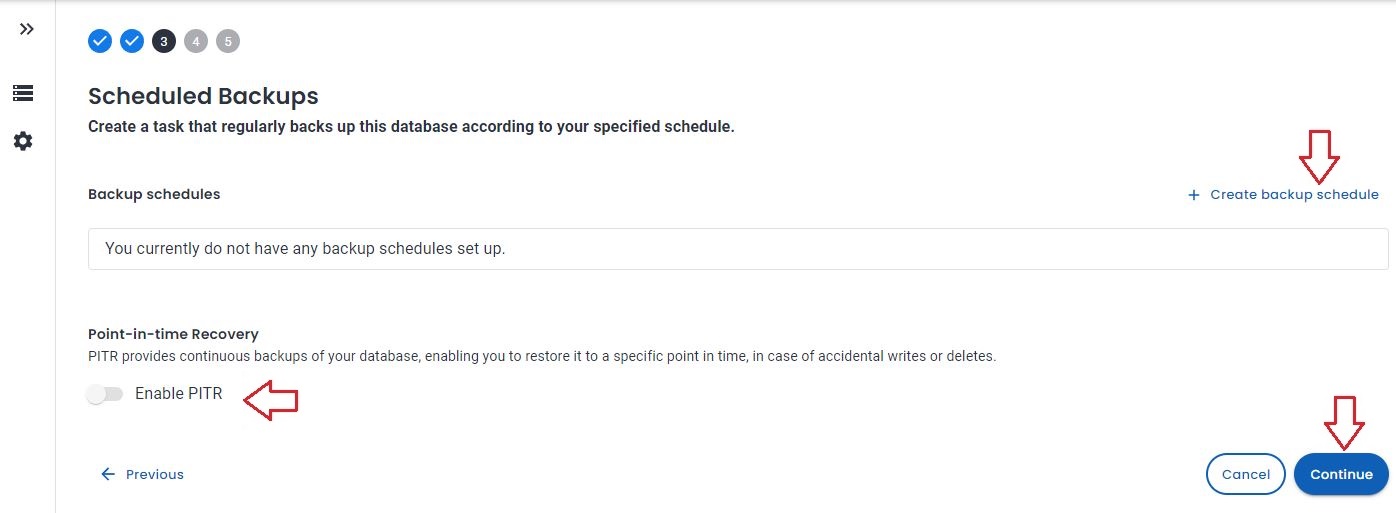
- Enable Backup schedule and Point In time Recovery
- Switch to Production
- Cutover Plan: Develop a cutover plan that includes a maintenance window, final data synchronization, and the switchover to the new database.
- ALWAYS perform a backup of the platform.
- Monitoring and Support: Set up monitoring with tools like Percona Monitoring and Management (PMM) to keep an eye on performance, queries, and server health.
- Verification and Documentation:
- Data Validation: Conduct thorough testing to confirm that all application functionality works as expected with Percona Everest.
- Documentation: Update your database documentation to reflect the new setup, configurations, and any changes made during the migration.

Summary of commands
| Use | Command |
| Get cluster state | kubectl get pxc |
| Get list of the pods | kubectl get pods |
| Return password for system users | DB_NAMESPACE='namespace'; DB_NAME='cluster-name'; kubectl get secret everest-secrets-"$DB_NAME" -n "$DB_NAMESPACE" -o go-template='{{range $k,$v := .data}}{{"### "}}{{$k}}{{"| pw: "}}{{$v|base64decode}}{{"nn"}}{{end}}'|grep -E 'operator|replication|monitor|root||xtrabackup' |
| Change password for a given user | DB_NAMESPACE='namespace'; DB_NAME='cluster-name'; USER='root'; PASSWORD='root_password'; kubectl patch secret everest-secrets-"$DB_NAME" -p="{"stringData":{"$USER": "$PASSWORD"}}" -n "$DB_NAMESPACE |
| Show the pod log for a specific container Tail style | kubectl logs pod-name --follow -c pxc |
| Return public IP for that pod | kubectl -n namespace exec podname -c pxc -- curl -4s ifconfig.me |
| Prevent operator to restart the pod | kubectl -n namespace exec pod-name -c pxc -- touch /var/lib/mysql/sleep-forever |
| Remove the sleep-forever file | kubectl -n namespace exec pod-name -c pxc – rm -f /var/lib/mysql/sleep-forever |
| Connect to pod bash | kubectl exec --stdin --tty <pod name> -n <namespace> -c pxc -- /bin/bash |
References
https://www.tusacentral.com/joomla/index.php/mysql-blogs/243-mysql-on-kubernetes-demystified
https://github.com/Tusamarco/mysqloperatorcalculator